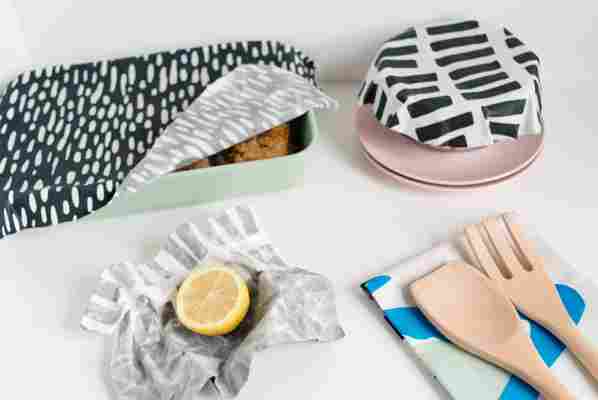
After trying out the reusable, beeswax-coated Bee’s Wrap for our “Green Your Clean” series, I wondered how easy it would be to make my own beeswax-coated food wrap. “Moderately,” it turned out.
Then I tried one of the simplest DIY tutorials I could find , which called for just beeswax on the fabric, and although I was worried it might crackle or otherwise fall apart, it happily turned out to be both the easiest method and the best. (Although next time I’d like to try the parchment-paper-and-an-iron method.)

Materials needed:
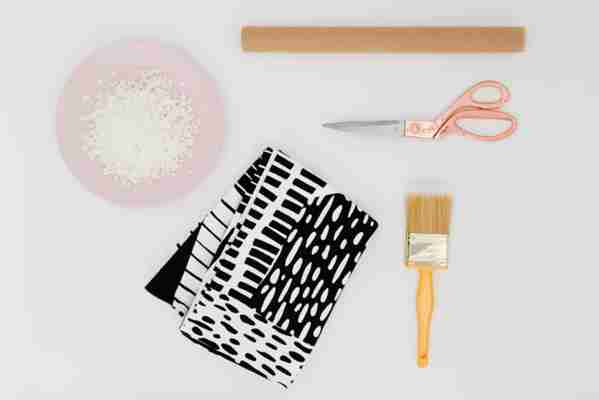
Beeswax beads (I bought these on Amazon )
Fabric (A good tip from the DIY fabric-wrap tutorial on Nourishing Joy : “the best options for fabric are something about the thickness of a bed sheet with a very tight weave.” I was also going to use a bed sheet, but the appeal of this IKEA fabric was too compelling.)
Pinking shears (to cut the fabric so it won’t fray)
Parchment paper
Baking sheet
Brush of some sort (optional)
Instructions:
1 . Pre-heat the oven to its lowest setting (or 200F).
2 . Using pinking shears, cut your fabric into the shapes you want. I went with an 8″ x 8″ square, several 11″ x 11″ squares and a couple free-hand rectangles once I felt more confident and realized it didn’t really matter. Just make sure they still fit within the confines of your baking sheet.
3 . Cover the baking sheet with parchment paper (I used foil-backed parchment paper), lay your fabric down, and sprinkle the fabric with beeswax beads. Put it in the oven and let it melt for 5-10 minutes.
5 . Once it looks like all the wax has melted, use the brush to sweep the wax around and ensure all edges and corners have also been saturated.
6 . Then peel the fabric up, wave it around in the air for a few seconds for the wax to harden (be mildly careful, although it shouldn’t burn you), and then hang it over the back of a chair or something to wait for it to fully dry. Then do it all again! (Ideally you’ll have multiple baking sheets so that you can have more than one piece of fabric going at a time; I did not, which made this all feel a little ridiculous at times.)
Eventually you’ll have a bunch of wax-coated pieces of fabric that are all totally bendy and durable…
… and that invite themselves to be folded into pleasant shapes around your food.
I only wish I’d had a bigger baking sheet, so I could’ve made larger squares/rectangles of these this time around. (And that I had more than one baking sheet.)
Worthwhile?
Compared to the Bee’s Wrap (which costs $18 for a pack of three differently sized squares), the homemade method is significantly more cost efficient, if this is the kind of thing you don’t mind spending your time on. The 1 lb. bag of beeswax beads I bought from Amazon cost $19, but it could cover at least 50 more 11″ x 11″ squares of fabric (if I ever need 50 more squares of it. Gift-giving?). Even less expensive: I could buy a block of beeswax (instead of a bag of beeswax beads) and grate it myself.
Outtakes
I first tried making it with the most ingredient- and labor-intensive DIY tutorial I could find, which called for not just beeswax but powdered pine gum rosin and jojoba oil — all three of which are also ingredients in the Bee’s Wrap. Because I wanted to make something that was as close to Bee’s Wrap as I could get, this seemed like a good bet. But I kept ending up with fabric coated in clumps of wax and oil/gum separated into disparate pools (more on that — plus pictures — at the end of this post). I’m not sure what I was doing wrong, but I couldn’t figure out how to get rid of the clumps, so I abandoned this method.
Here are a few outtakes from my first, failed attempt, from the otherwise very useful how-to on the website Mommypotamus (it has especially good recommendations for fabric and materials), with the jojoba oil and the powdered pine gum rosin, which for whatever reason did not work out for me.
– Re-edited from a post original published April 25, 2017 – DF
